
The Editing Process of My Fight Scene
- May 15, 2017
- 3 min read

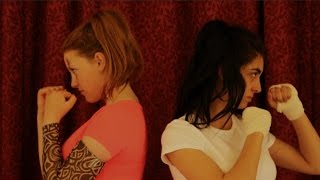
The editing process went well and helped develop my editing skills dramatically as the fight scene had to be edited to a fast and accurate pace. I started with lining up all of my shots and making sure they were in order, myself the day before numbering the shots I wanted to use. I then cut the clips down and tried to make them edit to a pace to add a sense of adrenaline and timing to the action. Listening to the audio, I knew there were areas that there could be sound effects to make the video impact the audience much more than the video would without them. I added some sound effects that I scoped out on YouTube and add music over the sound effects. This made the sound effects fade in and make them sound a lot more natural than they sounded separately. I used sound effects such as punches, blocks and screams to add some suspense to the fight scene.

RGB parade shows the red, greens and blues in the image or clip. By choosing this option, you can easily adjust the colours to make them balanced or equal to each other. By doing this, it creates the most natural look in the image and allows you to see the difference by giving a split screen to show the differences. As you can see on the images above, the bottom half is before and the top is afterwards, the top and left looking more realistic in colour tone. There is also something called the fast colour corrector that works alongside the RGB parade and brings up a colour wheel to quickly correct your colours.
The lumetri scopes can also give you the perfect skin tone of any coloured skin. The line between the red and yellow is where the correct colour for skin tone is. The more that the white is on that line, the more correct your skin tone will be. The scope also allows you to see how strong your colours are. If the white goes out of the hexagon, it cannot be shown on TV broadcasts as it makes the images de-saturated or too bright for a TV screen. Going outside of the hexagon is acceptable for internet purposes as this becomes no issue to the screens but will show up differently on every screen. By keeping it in the hexagon, it allows you to get a more constant colour throughout.

I used these two effects to edit my clips to make sure the actresses had the correct skin tone and that all the shots had the correct lighting to make them look as natural as possible. I had to try and line up all of the reds, greens and blues on the scope to make sure it was the most natural I could get the shot. I then made sure that the white inside the hexagon was aligned to make sure that the skin tone was natural and correct. After this I then created an adjustment layer to add the colour grade over all of the images and to create a vignette to create a cinematic look over my edit.
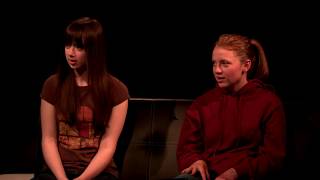
A issue was the chairs in the background couldn't be moved into a different room as there was no other rooms that it could have been moved in to. The bags can also been seen in the background but seem as if they can be edited out by cropping the shots.
What I would do next time would be to try and remove the chairs from the background to give off a better sense of isolation. I would also make the choreography longer as I didn't expect my other actor to not be able to turn up which made the choreography a lot shorter than I expected. I would of also made the actors practice more if we had more time to plan and film for this shoot; more than the times we practiced.


Comments